


If you use an iPhone, chances are you’ve used FaceTime at some point. FaceTime is a great way to keep in touch with friends and loved ones who live far away. FaceTime Photos is a feature that allows you to capture and save photos from your FaceTime video calls.
Table Of Contents
- 1 Why Can I Not Enable Facetime Photos?
- 2 How Do I Turn FaceTime Photos Back On?
- 3 Why Does It Say FaceTime Photos Must Be Enabled on Both Devices?
- 4 Why Won’t My iPhone Let Me Take FaceTime Photos?
- 5 Why Can’t I Enable FaceTime Photos
- 6 How to Enable FaceTime Photos on Mac
- 7 How to Enable FaceTime Photos Greyed Out
- 8 How to Enable Facetime Photos on iPhone 11, 12, 13, 14
- 9 How to Enable FaceTime Photos on Both Devices
- 10 FaceTime Photos Not Showing Up
- 11 How to Turn FaceTime Photos Off
- 12 Conclusion
This is How to Enable FaceTime Photos:
- Open the Settings app on your iPhone or iPad.
- Scroll down and tap on “FaceTime.”
- Make sure that the toggle switch next to “FaceTime” is turned on.
- Scroll down to the “Calls from iPhone” section and make sure that the toggle switch next to “FaceTime” is turned on.
- Scroll down to the “FaceTime Live Photos” section and make sure that the toggle switch next to “Live Photos” is turned on.
- Once you’ve enabled FaceTime Photos, you’ll be able to capture photos during FaceTime calls by tapping on the shutter button that appears on the screen during the call.
- Your FaceTime Photos will be saved to your device’s Photos app.
That’s it! With FaceTime Photos enabled, you can capture special moments during your FaceTime video calls and save them as cherished memories.
Related: Is FaceTime Free Internationally in 2023?
Why Can I Not Enable Facetime Photos?
There are a few reasons you may be unable to enable Facetime photos. Firstly, check to see if your device is connected to the internet. If it isn’t, then that’s likely the issue right there.
Secondly, ensure you’re signed into your Apple ID account in the Settings app. If you’re not, you won’t be able to use Facetime.
Finally, check to see if there’s an update available for the Facetime app. If there is, update the app and enable Facetime photos again.
How Do I Turn FaceTime Photos Back On?
If you want to know how to turn your FaceTime photos back on, it’s not complicated. Here’s a step-by-step illustration:
- First, open the Settings app on your iPhone.
- Second, scroll down and tap on the FaceTime entry.
- Third, find the “FaceTime Camera” switch and flip it to the ON position.
That’s all there is to it!
Related: How to Share Screen on iOS – Follow These Quick Steps
Why Does It Say FaceTime Photos Must Be Enabled on Both Devices?
Most likely, your device displays a message that says, “FaceTime photos must be enabled on both devices” because you have not yet allowed FaceTime to access your photos.
By allowing FaceTime to access your photos, you’re permitting it to use your camera and microphone so that you can make video calls with other people.
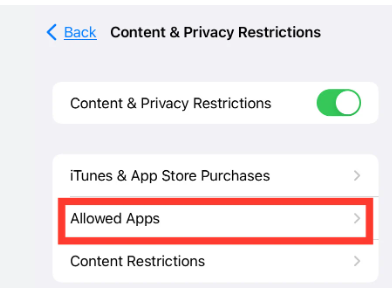
If you need help allowing FaceTime to access your photos, you’ll need to open the Settings app on your device first. Once in the Settings app, scroll down until you see the section labeled “privacy.”
In the privacy section, there will be a list of apps that can access different parts of your phone – like your camera or microphone. Find the FaceTime app in this list and tap on it.
When you tap on the FaceTime app, a new screen will pop up with information about the app’s permissions. Near the top of this screen, it should say “photos.” If there’s a switch next to this setting that says “off,” tap on it so it turns “on.”
Related: How to Record Incoming Call On iPhone Without App
Why Won’t My iPhone Let Me Take FaceTime Photos?
There are a few reasons why your iPhone might not let you take FaceTime photos.
- One likelihood is that you need more storage space on your phone. If you’re constantly taking and deleting pictures, eventually, your phone will fill up, and you will need more space to take new ones.
- Another probability is that the camera on your phone is broken or dirty. If the lens is cracked, it won’t be able to take pictures. And if it’s just dirty, that can also interfere with the quality of your photos.
If neither of those solutions is the problem, it might have something to do with the actual Facetime app itself. Ensure you’ve updated to the latest app version, as they often release updates that include bug fixes.
Why Can’t I Enable FaceTime Photos
There are a few reasons you might need help to enable Facetime photos.
- The first reason is that your phone might not be compatible with the feature. If you have an older iPhone, for example, it might not have the necessary hardware to support Facetime photos.
- Another reason you need help to enable FaceTime photos is that your carrier might not support the feature. If you’re using a carrier that doesn’t support FaceTime photos, you won’t be able to enable the feature, no matter what.
Finally, if you’ve already enabled FaceTime on your phone but still can’t seem to get the photos to work, there may be a problem with your internet connection. If your connection is too slow or unstable, FaceTime photos won’t work.
How to Enable FaceTime Photos on Mac
To enable FaceTime photos on a Mac, follow these steps:
- Open the Photos app and select the image you want to use.
- Right-click the image and select “Use as FaceTime Photo.”
- If you are using an iMac with a Retina display, you will need to clear your browser cache to see the new photo take effect. To do this, open Safari and go to Safari > Preferences > Advanced. Select “Show Develop menu in menu bar” and close the preferences window. Next, go to Develop > Empty Caches.
- Finally, open FaceTime and choose the contact you want to call. It will display a new photo next to your name.
How to Enable FaceTime Photos Greyed Out
Assuming you have an iPhone with a Facetime-enabled camera, you can use the Camera app to take Live Photos during a FaceTime call. The photos will be taken automatically as you talk, and they’ll be saved on your device.

However, the Live Photo feature is turned off if the Camera app is greyed out when you launch it during a FaceTime call. To turn it on, follow these steps:
- Open the Settings app and scroll down to the “FaceTime” section.
- Tap the “Live Photos’’ toggle to turn it on.
- Now launch the Camera app during Facetime and take Live Photos as usual.
How to Enable Facetime Photos on iPhone 11, 12, 13, 14
There are only a few steps to follow to enable Facetime photos on iPhone 11, 12, 13, or 14.
- The first step is to open the Settings app.
- Go to the Privacy settings and scroll down to the bottom where it says “Photos.”
- Next will be a switch that says “Share My Photo.” You will want to make sure that this switch is turned on.
- The final step is to go back into the FaceTime app and ensure that the option for “Allow Live Photos” is turned on.

With these steps completed, you should now be able to take FaceTime photos!
How to Enable FaceTime Photos on Both Devices
Assuming you have FaceTime set up on multiple devices, here’s how to enable FaceTime photos:
- On your iPhone, go to Settings > FaceTime.
- Toggle on the switch next to “FaceTime.”
- A menu will pop up, asking if you want to use FaceTime with your Apple ID or phone number. Select one option.
- On your Mac, open the FaceTime app.
- From the main screen, select “Preferences” from the drop-down menu in the top left corner of the screen.
- Select the “Settings” tab and check the box next to “FaceTime.
- Close the Preferences window.
FaceTime Photos Not Showing Up
You can try a few things if you’re having trouble seeing your FaceTime photos.
- Make sure that your device has the latest software update
- If you still can’t see your FaceTime photos, try restarting your device
- If that doesn’t work, try signing out of your iCloud account and signing back in
Finally, you can reset your device to its factory settings if all else fails.
How to Turn FaceTime Photos Off
Your FaceTime photo library can quickly become cluttered if you’re not careful. Thankfully, there’s an easy way to turn off this feature. Follow the steps below, and you’ll be able to keep your FaceTime photo library nice and tidy.
- First, open the Settings app on your iPhone
- Scroll down and tap on the Photos & Camera option
- Under the “Camera” heading, you’ll see an option for “Save Recently Deleted.” Toggle this off
Now, open the FaceTime app. Tap the menu button in the top left corner (the one with three lines). Then, tap on “Settings.” Scroll down and tap on “Delete All.” Confirm that you want to delete your photos by tapping on “Delete All” again.
And that’s it! Now, your FaceTime photos will no longer be automatically saved.
Conclusion
Overall, enabling FaceTime photos is a simple process. Ensure you have the latest version of iOS installed on your device, and then follow the steps outlined in this article. With FaceTime photos enabled, you’ll be able to take advantage of all the features that FaceTime offers, including taking pictures and videos with your friends and family.