The right click (Context) menu is a shortcut menu that pops up showing a set of commands that can be performed on a file, computer desktop, folder or the start menu in Windows 10. This feature is very useful as it provides quick access to commands that you might need to perform frequently, making it a lot easier to complete your tasks.
However, if left unchecked, the context menu can be cluttered with too many commands and items that you don’t even use. This article will show you how you can modify the Windows 10 right click menu to suit your needs and taste.
Related: How to Remove Write Protection From USB Drive in Windows 10
Table Of Contents
- 1 Various Right Click Menus in Windows 10
- 2 Customizing the Windows 10 Start Button Context Menu
- 3 Add Items to Windows 10 Start Button Context Menu
- 4 How to Customize Folder/ File Right Click Menu in System Registry
- 5 How to Modify Folder Context Menu in Windows 10
- 6 How to Edit the Right Click Send to Menu
- 7 Conclusion
Various Right Click Menus in Windows 10
The context menu appears when you right-click an item such as an empty space on the desktop, a file/folder or the start button. When using a touch screen PC, you can open the right click menu by long pressing the item.
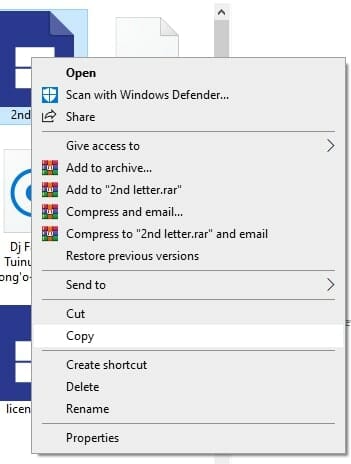
The menu item varies as it displays commands and shortcuts pertaining to the item. For instance, when you right click a file, the menu displays items pertaining to the file such as ‘Open’, ‘Copy’, ‘Paste’, ‘Share’ and so on
Customizing the Windows 10 Start Button Context Menu
The Start button context menu is a quick link menu that shows up once you right click the start button in Windows 10. The menu contains shortcuts to common configuration, management and power user tools.
To open the Start Context menu, right click the Start button or press "Win + X" keys on your keyboard
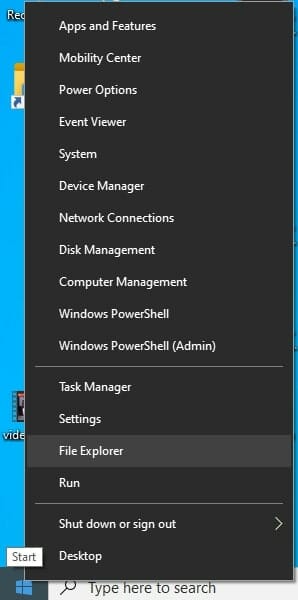
The menu is split into three sections namely Group 1(bottom section), Group 2(middle section) and Group 3(top section).
Windows 10 Start context menu has been optimized to allow quick access to various features and settings. Nonetheless, you can remove any item that you do not want in the right click menu.
Open the File Explorer by pressing "Win + E" keys on your keyboard.
Copy and paste the following path in the address bar "%LocalAppdata%\Microsoft\Windows\WinX" and hit the Enter key.
Open the Group folder with the shortcut you want to get rid of. For this instance, we would like to remove File Explorer, which is in Group 2 (the middle section)
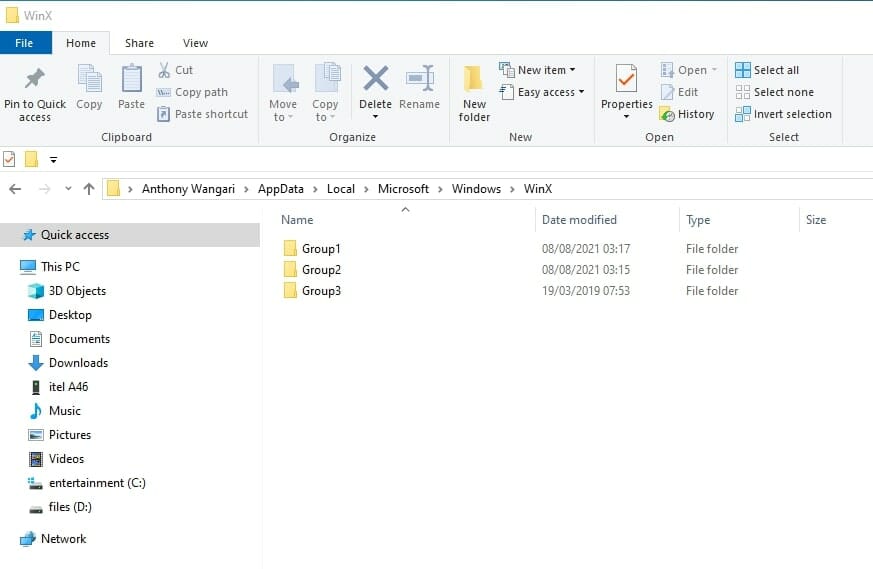
So open Group 2 folder, right click the shortcut and choose "Delete". Confirm the action when prompted.
To apply the changes, sign out then sign into Windows and check whether the item has been removed.
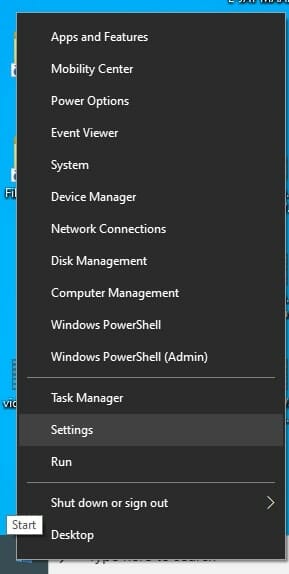
How Rename WinX Menu Items
You can modify the name of the items in the WinX quick link menu.
Navigate to the WinX folders in File Explorer and open the Group folder containing the item you would like to rename.
Right click the shortcut and go to "Properties", the last of the options

On the dialog that appears, go to the "Shortcut" tab. Type the new name in the "Comment:" text box.
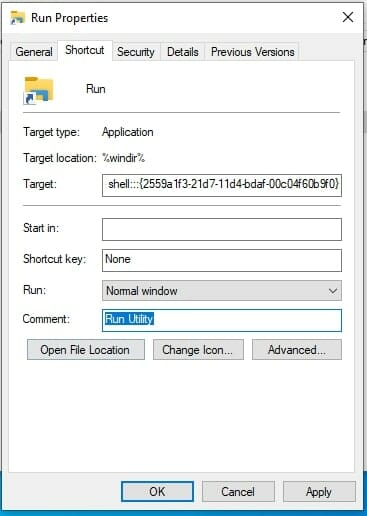
Click "Apply" then "Ok". Logout and then in to apply the changes.
Add Items to Windows 10 Start Button Context Menu
You can add a few items such as 'Control Panel' or 'Command Prompt' into the WinX menu.
Search for the control panel in the search box and select "Open File Location".
On the resulting directory, copy the Control Panel shortcut.
Navigate to the WinX folder and open the Group where you want to add the shortcut.
Paste the shortcut you copied in the above step and close the File Explorer.
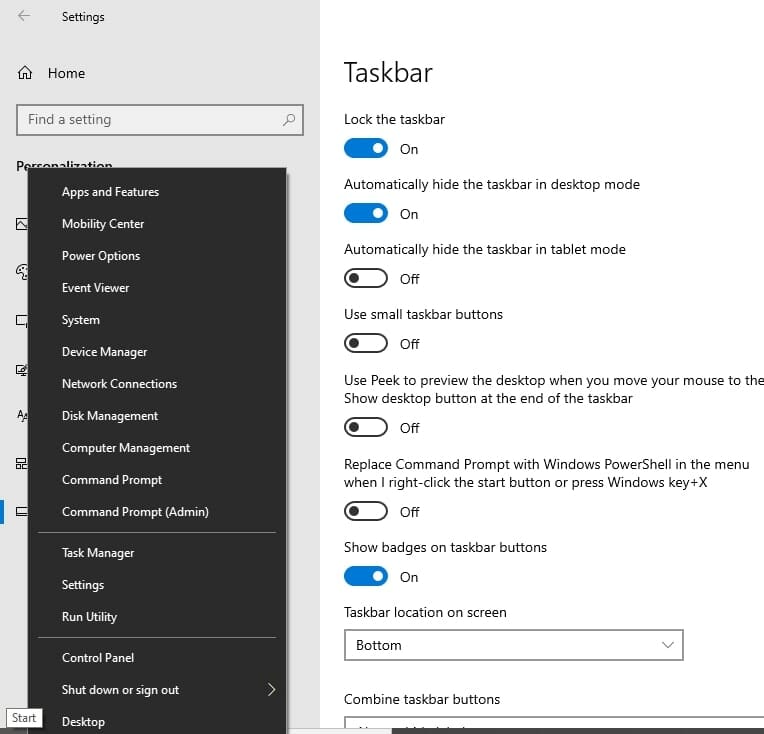
To add 'Command Prompt', open the settings app and navigate to "Personalization > Taskbar" settings.
Toggle off the switch under the heading "Replace Command Prompt with…". Open the Start button context menu to verify the changes.
How to Customize Folder/ File Right Click Menu in System Registry
While the idea behind the right click menu is to provide more commands for the selected folder file, you may want to remove or add some options to the menu to suit your daily needs.
How to Remove/ Restore Items to File Context Menu
Press the "Win + R" keys to open the Run dialog. Type 'regedit' and click "Ok" and then approve the changes by clicking "Yes" on the UAC prompt that follows.
Navigate to "HKEY_CLASSES_ROOT\*\shellex\ContextMenuHandlers" and click the arrow to expand.
The list contains keys for the items found in the file right click menu.
To remove an item, for example "Open With", click the key on the left pane of the registry editor to display the values on the pane.
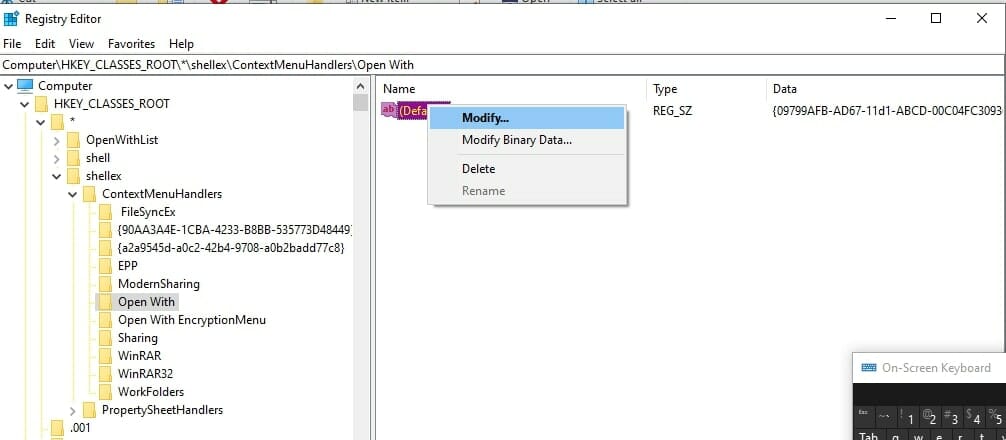
Right click the value and select modify
To disable the item, add a negative sign (-) before the value data and click "Ok" to save the changes.
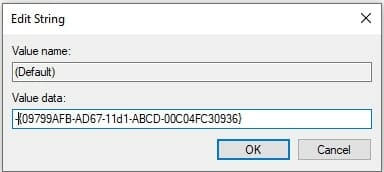
To restore the item, edit the value data to its original.
You may also right click the key on the left pane and select "Delete" if you want to remove the menu item permanently.
When you right click a file, you will notice the "Open with" option or any other removed item missing.

How to Modify Folder Context Menu in Windows 10
Similarly, you can edit the right click menu for folders.
In this case open "HKEY_CLASSES_ROOT\Folder\shellex\ContextMenuHandlers" to open the folder context menu keys.
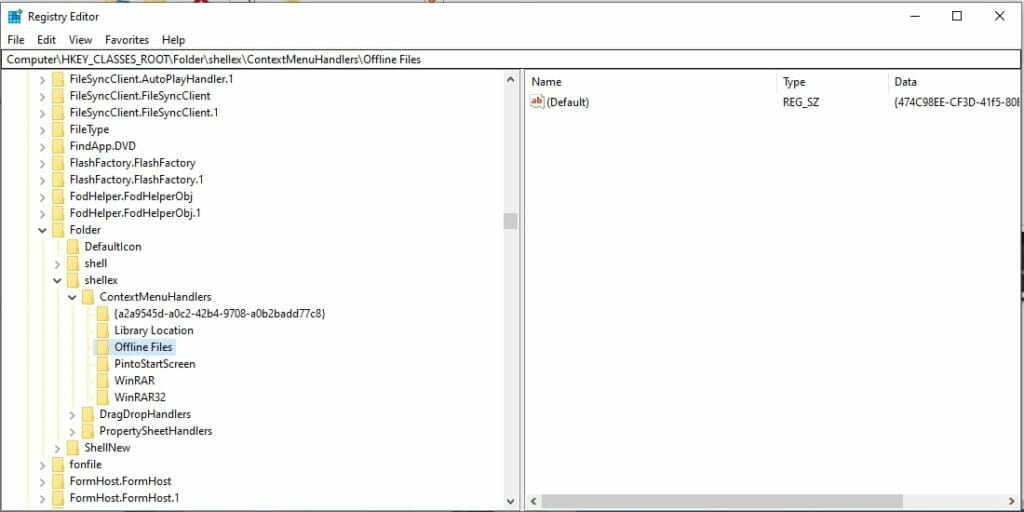
Follow the same process described above to remove or disable the Folder context menu items.
How to Add a Program to the Windows 10 Right Click Menu
Another way to modify the right click is to add your favorite program to enhance usability. In this guide, we will add ‘Publisher’ to the menu.
To do so, first open the program and copy the path <Image: ProgramPath.png>.
Open the registry editor and go to "HKEY_CLASSES_ROOT\*\shell". To create a registry for the program, right-click the “shell” folder, select “New > Key”.
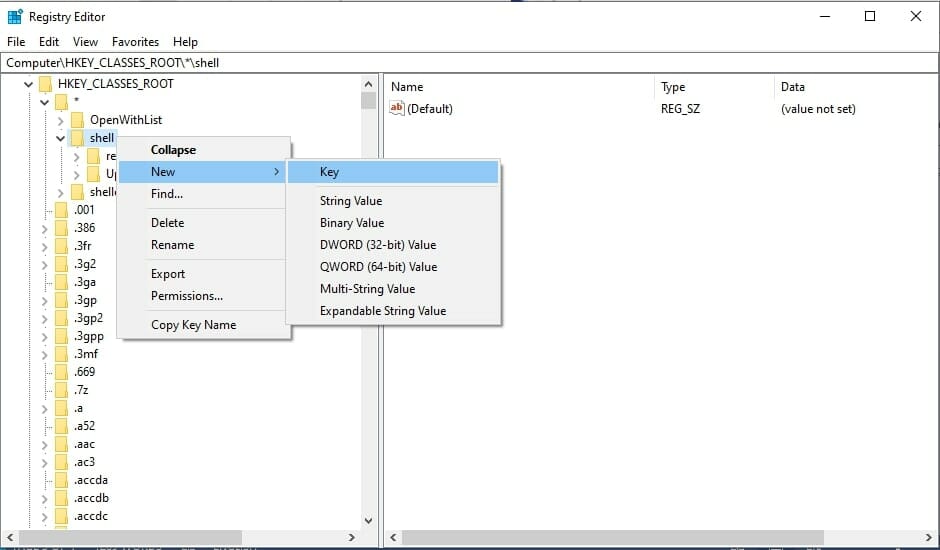
Rename the created key to “Publisher”. Right-click the new key and create a new sub key and rename it to “Command”.
Double click the sub key “Default” value on the right pane to edit the value data. Paste the program path you copied above in the value data text-box and click “Ok”
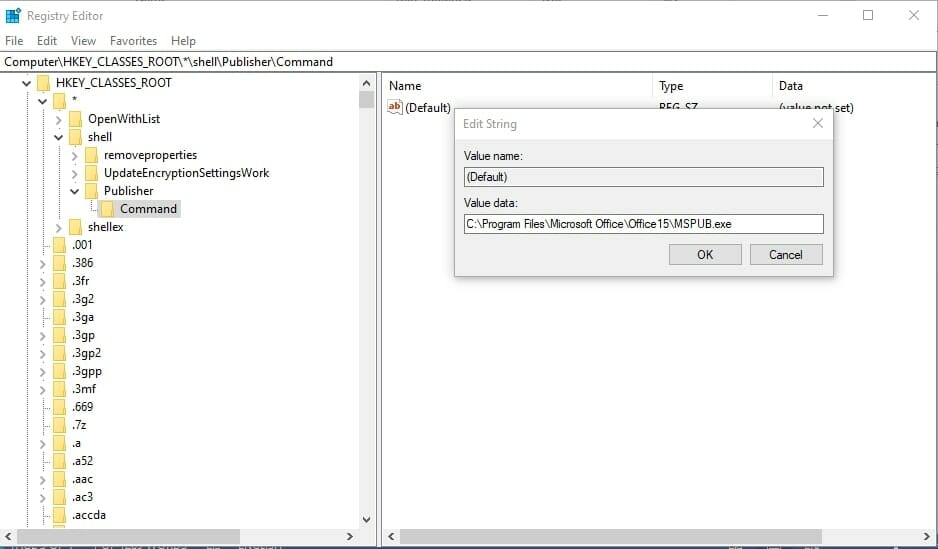
Now close the registry editor, log off, and then login to make the change. When you open the context menu, you will find “Publisher” in the right click menu. If you click the option, it will open the program.
How to Edit the Right Click Send to Menu
When you hover the mouse over “Send to” on the right click menu, it expands the menu showing more menu items. You can personalize these items by removing or adding an item.
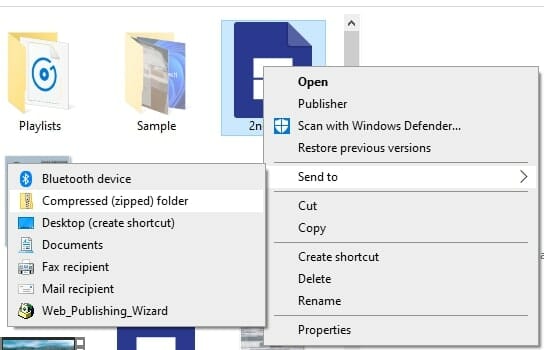
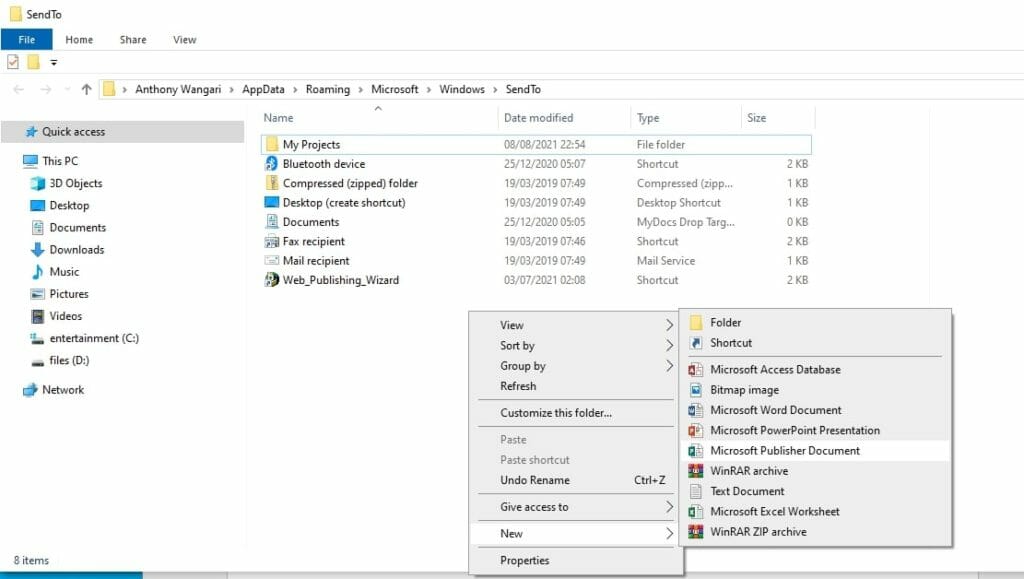
Open the ‘Run’ dialog, type ‘Shell:sendto” and hit Enter.
This will open a folder with all the current send to options. To remove an item, right click it, select “Delete” and confirm the action on the resulting pop-up.
To add a new item, right click an empty space, select “New” then add a folder, a program or a shortcut among other options.
Conclusion
The Windows 10 right click menu is a useful feature through which you can easily access common commands that you need to perform on the selected object. As you continue installing new apps, Windows automatically adds commands to the menu. With time, the context menu can be overloaded with too many items some of which you don’t need or use. You can use the above solutions to personalize the context menu and thus enhance your Windows 10 user experience.


